Tags
Share
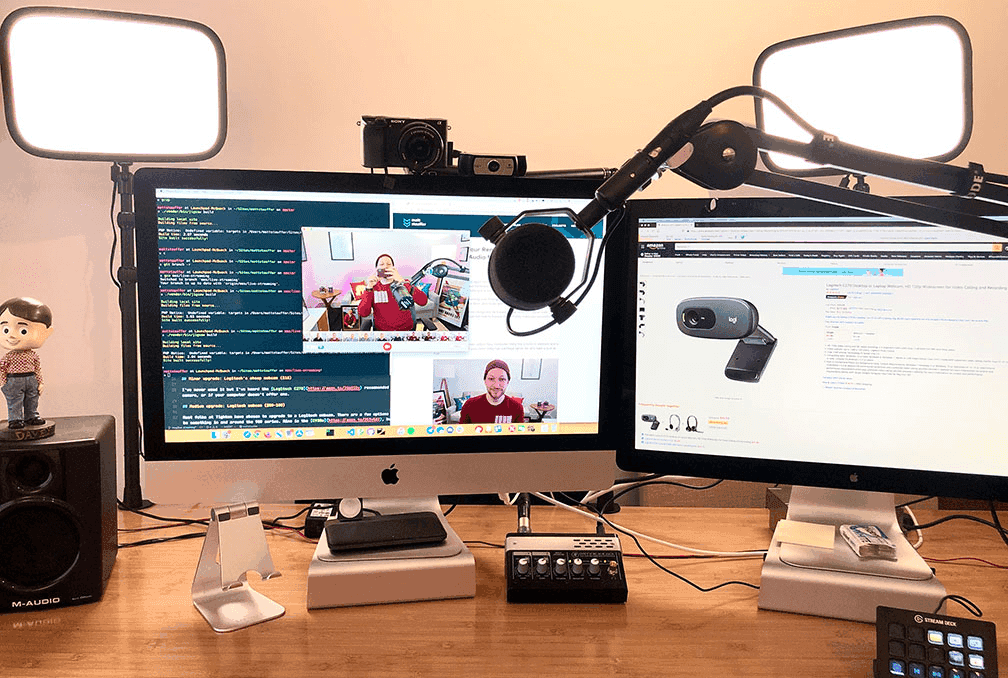
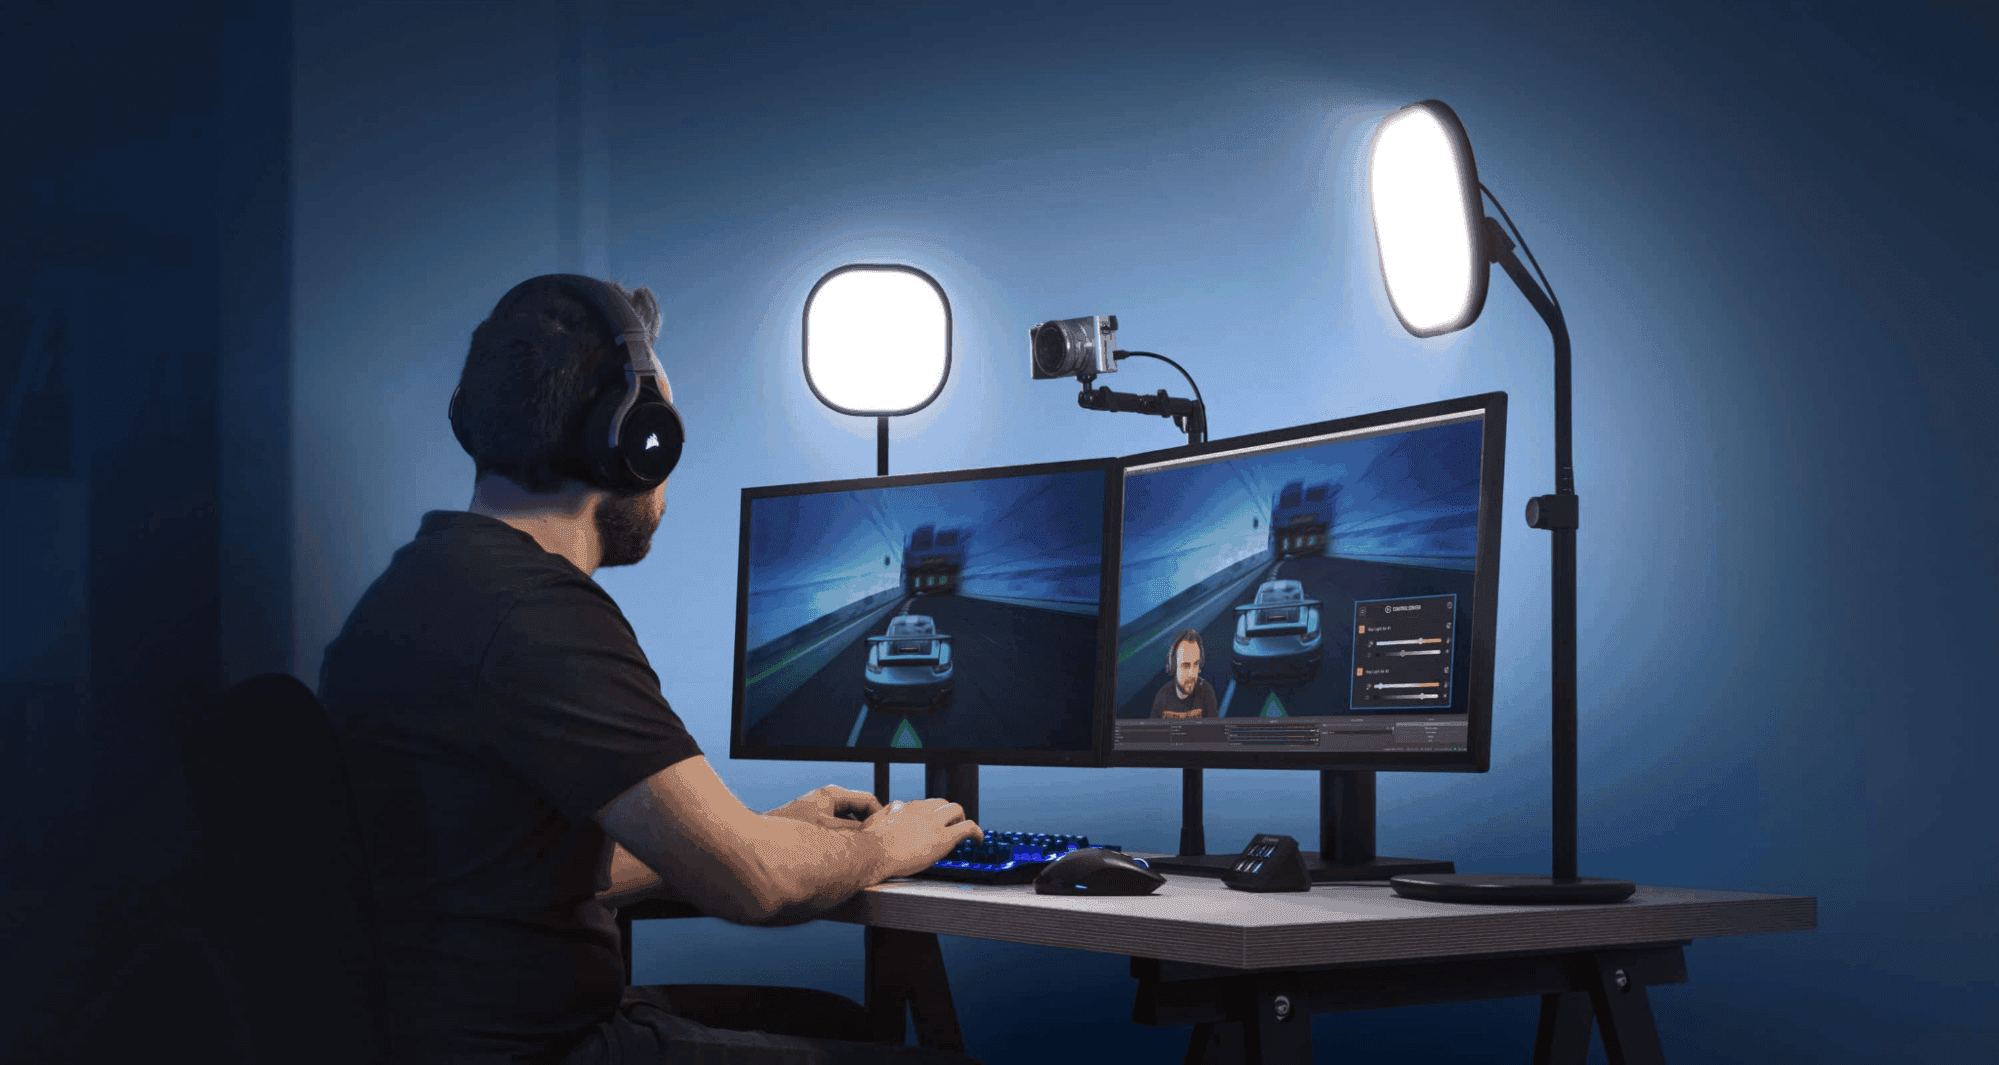
Look professional during virtual meetings with an upgraded webcam lighting setup.
If you only have the occasional video call with your team and don’t really talk to clients, prospects, or customers, you may not care too much about your webcam lighting, and that’s fair.
But if you are in an external-facing role and meet with VIPs, investors, and customers over video conference calls, then this one's for you.
Other than having a good piece of video conferencing software that doesn’t cut in and out, having a good webcam and good lighting can also make your video meetings look much more professional.
So, here’s a quick guide on how to improve your webcam lighting—with as little effort as possible.
Why is my webcam lighting so bad?
There are a number of factors that can affect how others see you during a video call—and it’s not always about lighting. Here are some of the most common things that affect your picture:
A poor-quality webcam. Some webcams are just not great, and will always produce a poor visual, no matter how good your software is.
Lighting in your environment. Problems with lighting can come up for a number of reasons. You may be in a dark room without enough natural or artificial lighting to provide adequate illumination. There may also be too much light if you (or the camera) are in direct sunlight.
Reflections. Even if you’re not in direct sunlight, it may be that a room with a lot of windows produces too much reflection, producing “blind spots.”
Clashing. This is a rare one, and it really only applies when you’re wearing really loud clothing (try not to wear reflective clothing).
👉Dialpad tip:
Always wear an outfit that does not clash with the background colors in your meeting location.
2 quick webcam lighting tips to look your best for online meetings
It’s not just about lighting, but also about the environment. Ensuring you have an optimum combination of the two means you can have a clear and professional video call.
1. Check your surroundings
There are a number of things you need to consider about surroundings and background, especially if you’re working from home:
Backgrounds that clash with your outfit
Busy or cluttered surroundings
Children or pets that could interrupt a video meeting (try to keep the room door closed or risk going viral)
Direct sunlight behind you (and thus shining straight into camera)
👉Dialpad tip:
If you’re unsure of how the surroundings will work, try a few different positions until you find the best one.
2. Camera placement
Camera placement is also important, and how you place it depends on the type of camera you’re using. (More on this later.)
A common rule is to have the camera as close to eye level as possible (eye contact is as important in a video meeting as in a real life meeting). It should also be angled slightly downwards. Here are some other things to remember:
If you’re using an external HD webcam (Logitech offers a good range), use an adjustable tripod or webcam grip if possible. If not, place it on something (pile of books, box, etc.) on the tabletop behind your monitor. The USB webcam should again be angled downwards and in line with your forehead.
If budget isn’t an issue, you can go for a pricier webcam like Razer that’s perfect for high-quality video calls, and Neewer also offers great webcam lighting, too.
If your laptop has a built-in webcam, place your laptop so that the camera is level with your forehead, if possible. This covers all laptops from Windows-based systems to your Mac or Macbook.
While it’s not ideal, you may sometimes not have much choice other than to use a mobile phone or tablet (for example, if you’re on the road when a meeting is scheduled). If this is your only option, then try to make sure you have a stand, suction cup, or a phone holder that can hold your Android phone or Apple iPhone at a higher level.
Now, let’s look at some DIY lighting tips if you want to get creative with your video conferencing setup.
DIY lighting tips

Thing is, adjusting your webcam brightness levels alone may not always help.
But you also can’t be expected to have Hollywood lighting or even close to the sort of lighting a professional photographer uses. So what should you do if your video call isn’t lit well?
Here are some easy DIY things to try (and if you want to really go professional, companies such as Lume Cube offer various more upmarket options).
1. Two-point or three-point lighting
These are simple “hacks” you can do without having to buy additional equipment.
For two-point lighting, all you need is two lamps, ideally fitted with daylight bulbs (easy to find at your local hardware store). Have the two light sources pointing directly at each other, with you between them. So, there should be a straight line between source one, you, and source two.
Three-point lighting is a little bit more complicated, but can make your video call look far more professional. If you’re recording a webinar or video content for a marketing project, then this would be a “next step up” that might be worth the effort. The three points should be:
Key light. Can be to either the right or left of the camera, around 45 degrees from it and pointing 45 degrees down onto the subject (that’s you!).
Fill light. This light source shines on you but from a side angle to reduce any shadows caused by your key light. It’s usually about half as bright as your key light.
Backlight. As the name suggests, this light source is located behind you and sometimes slightly to the side.
👉Dialpad tip:
If you want to use a three-point solution, you may want to experiment with it until you find the setup that best suits both you and your webcam. And if it sounds confusing, have a look at a handy video tutorial.
2. Tools that can improve lighting

Daylight bulbs
As we mentioned earlier, these can be easily (and cheaply) bought at any hardware or electrical store. As you can guess, they’re designed to imitate the natural light produced by the sun. They produce a higher color temperature than other lightbulbs such as LED lights.
Ring lights
Often used by photographers, these are also called selfie ring lights and are a great solution to your lighting issues.
They’re also relatively cheap and can cost under $30 from a site like Amazon. They produce a uniform light source that you can place anywhere to adjust the lighting, and they usually comprise one circular fluorescent bulb or perhaps an LED ring light.
3. Key lights
Another trick borrowed from photography, key lights are a primary light source that can complement natural light or other artificial light sources (such as overhead fluorescent strips). A key light is usually placed at an angle in front of you and can be adjusted to give the best effect.
4. Diffusers
You may find that no matter what type of lighting setup you use, it still ends up being a little too bright. Diffusers are a great way to reduce that brightness. While professional ones can be a little pricey, there are budget options on Amazon or you can even buy diffuser fabric and make your own to fit.
5 best practices to improve your video conferencing experience overall

So, let’s assume you’ve got a good lighting kit and a great unified communications platform. Here are some other ways to improve the quality of your video call.
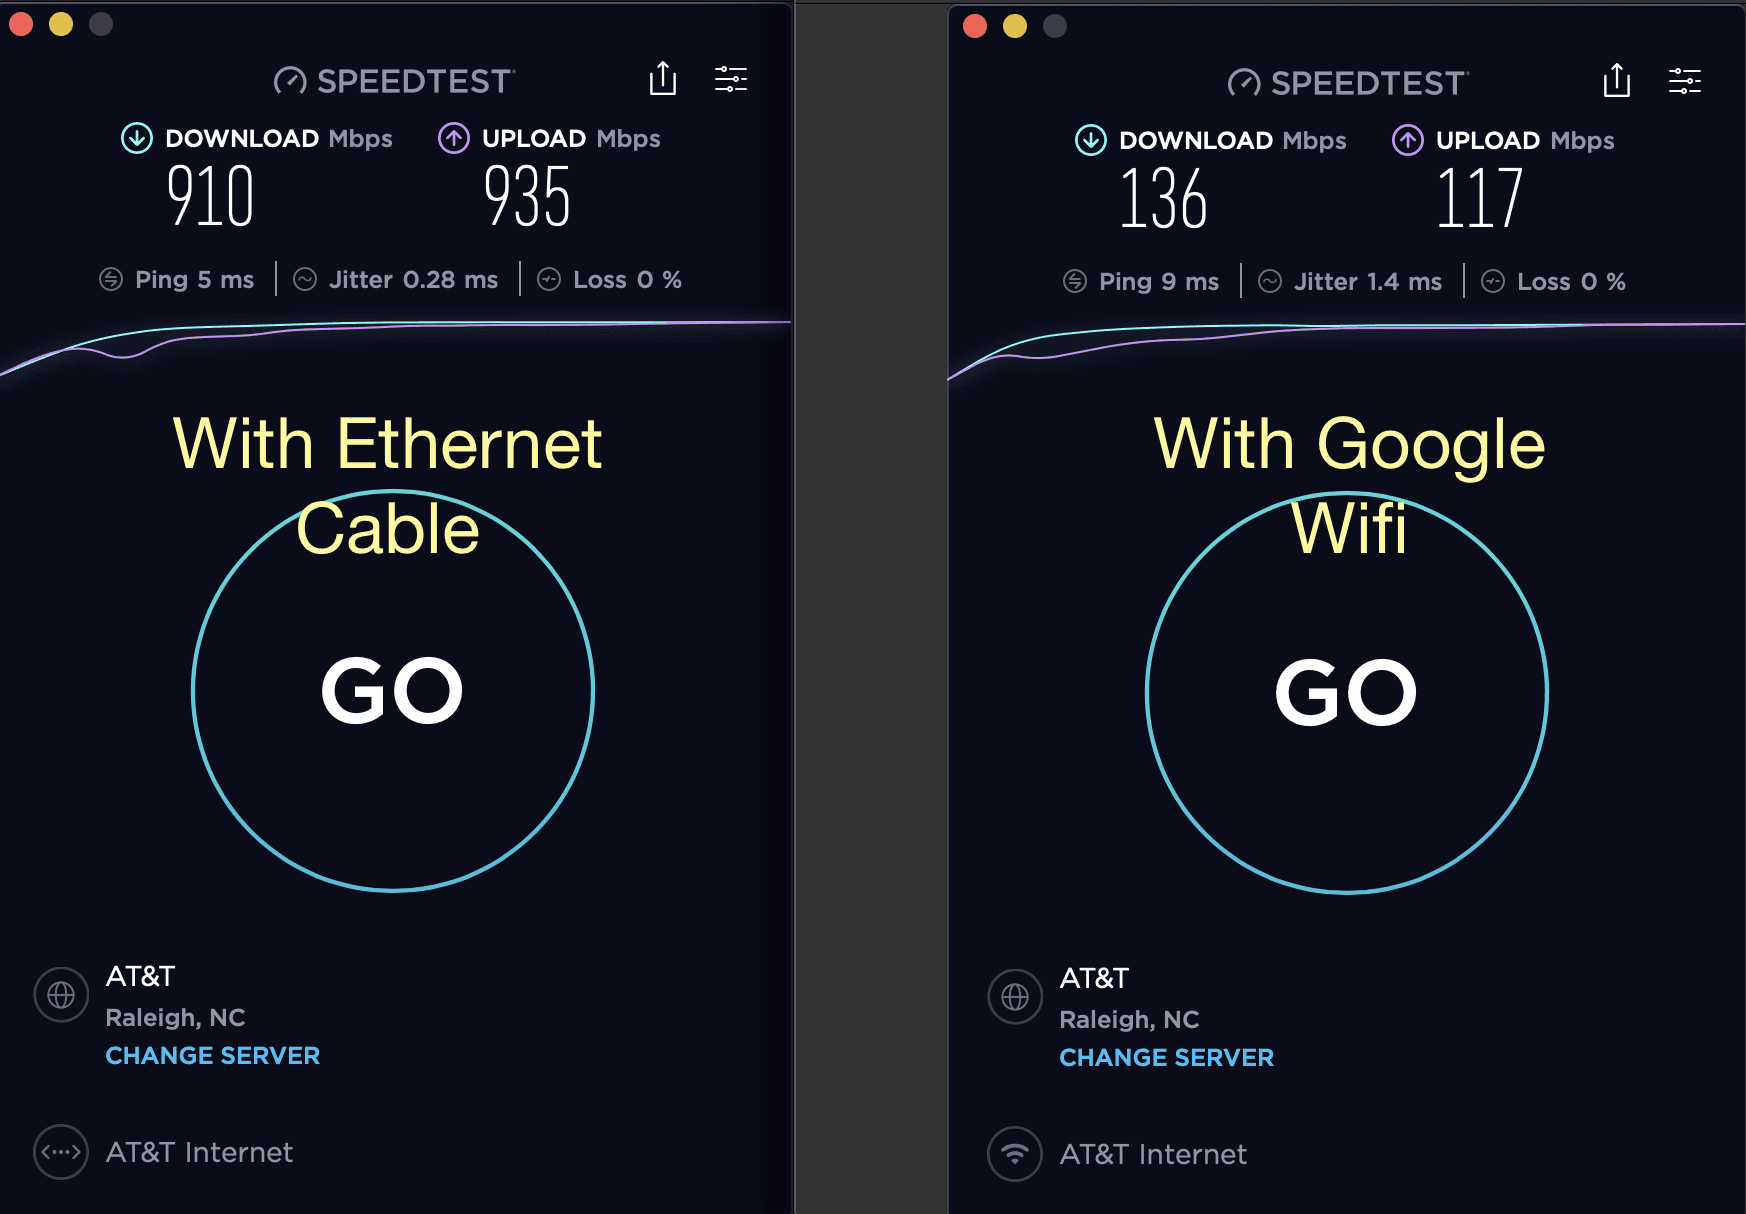
1. Connect with an ethernet cable

The problem with using Wi-Fi for a video call is that you're at the mercy of your router and modem. Sometimes, the signal goes out and you have to reset your router to get things going again.
If you know you’ll be on an important video call and your Wi-Fi signal has a history of being shaky, you might want to connect using an ethernet cable instead, which will give you a far stronger connection.
It doesn’t matter what speed your internet connection says it is, if the modem transferring that signal via Wi-Fi isn’t sufficient (and it usually isn’t), then you’ll only see a fraction of the speed you expect.
Use an ethernet cable and you will see most, if not all, of the speed you signed up for.
2. Use a headset
Being able is an important factor in any video call, being able to hear, and be heard, clearly is even more essential. After all, being able to see Bob clearly is not much use if you can’t hear what he’s talking about. Built-in speakers and microphones aren’t always the best, so it may be time to invest in a headset.
You can get a fairly decent set of headphones with a noise-cancelling mic for under $20, so they won't break your budget. These can help eliminate the issues caused by those annoying background noises like passing traffic, noisy children, or that neighbor who has decided he wants to be a heavy metal drummer.
3. Clean up your environment
You want to maintain a certain level of professionalism when working from your home office. And that extends to your background when having a video meeting or call.
You should try to ensure that your environment, or at least as much of it is seen on camera, is clean and clutter-free. You could even cheat by positioning yourself and the camera so viewers see the tidy part of the room.
Of course, many providers like Zoom offer you the option of a virtual background but that, too, can be problematic. If you do go that route, ensure it works with the lighting you’re using and always try and choose something neutral. What seems amusing to you may not be funny to your boss or any clients you call.
4. Dress professionally
Ok, we know that one of the perks of working from home is that you can usually dress, or not dress, exactly how you like.
There’s nothing better than lounging in those fetching Hello Kitty pajamas while looking over a pile of spreadsheets. But when it comes to online meetings, you need to put aside that “comfort above all else”’ dress code, at least for the duration of the meeting.
Now that doesn’t mean you have to put on your best suit and silk tie. Think smart but casual in most circumstances; a work shirt and suit trousers will more than suffice.
Or, if you prefer a blend of comfort and style, consider wearing a self-designed hoodie that adds a touch of your personality while keeping things professional.
Though, if you’re having a video meeting or live streaming with an important client you hope to close a deal with, maybe slip a tie on as well.
5. Mute appropriately
Imagine a company-wide online meeting with 200 participants.
Now imagine that every person has their microphone on.
From a noise perspective, it would likely be chaotic and hard to follow any conversations or points made. There is a generally accepted rule that if a meeting involves three or more people, then everyone but the speaker should be muted.
Generally, it’s good to just have a habit of keeping yourself on mute when you’re not speaking.
And if someone is doing a presentation, then you should definitely mute yourself by default. Same deal if there is a lot of unexpected background noise (those pesky kids again). And if you really have to eat or drink during a call—you guessed it—mute yourself.
Upgrade your webcam lighting setup to get the professional look
So you already know the practices to get the best out of Dialpad's unified communications platform. But even the best system or best webcam, as you now know, may not help if external factors such as lighting or environment (or those Hello Kitty pyjamas) let you down.
You may worry that upgrading any lighting options will be too expensive to consider, but the reality is that it takes little effort or expenditure to achieve good lighting without the professional price tag.
Done correctly, you can even use existing desk lamps in your house simply by buying a few day light bulbs to produce that almost sun-like illumination.
With a little effort, and by following our other tips, you can take your video meetings to the next level!
Take Dialpad for a spin
Sign up for a 14-day free trial to get phone calls, video meetings, and instant + SMS/MMS messaging in one place. It takes just a few minutes to get started, and you'll be set up with a virtual phone number too!


